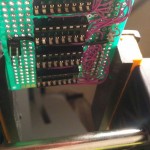
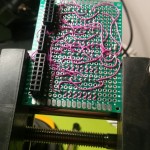
I’ve had some time this week to finish up soldering the caution panel and control board, wiring the control board was a bit tricky, the control panel is reversed compared to the caution panel itself, and then I need to wire the whole thing backwards, which flips it again…
After finishing up the Caution panel, I’ve started by soldering the Shift registers outputs to the connectors
Once this is done, I started wiring the chips themselves,
Each chip needs to have 5V, GND, CLK and LATCH, OE (Output Enable) tied low RES pulled high. And all of them need to have Serial Data chained in the correct order between all the chips. and of course tie everything into the correct position on the connector – (hoping not to mess things up).
I’ve used my control PCB eagle board design as reference with the schematics – I still hope I haven’t messed up too badly – But I’ll only know that when the boards will come in from china.
Now let’s look at how the Boards integrate with the rest of the project
As I’ve said, I have finished the control boards and mated it up with the lighting board and tested all the connections with a multimeter
Once I was satisfied with the results (I.e. all the leds lit properly) – I’ve put in the shift register chips into position.
After that I ran a quick test program to make sure everything is wired correctly..
Once this was verified.. I’ve connected it to the Arduino to check that everything works… I’ve decided to go all out and enabled everything planned for the first release.
DED, FFI, PFL, Indexers and Caution panel. However, I have not connected the Indexers – but they were active in the code.
I’ve spun up a quick “Instant action” and started breaking the Aircraft – It’s a bit of a lengthy clip – But I needed to make sure the leds light up correctly to real events and not just synthetic tests.
As you can see everything is pretty much ready to go.
I’m currently still waiting on my PCBs to arrive from China, They are probably held in customs due to some holidays here.
Once they arrive, I will perform last bug fixes and adopt the code for Arduino Due as well, I really have high hopes from it to solve some of the Refresh rate issues I see with the Uno and Micro with large number of screes. which will be required for the next steps in the project.
The Next step will be to mount the whole thing in the Cockpit – Which will require some modifications to the frame. But before that, I’ll post some more on the programming aspect of the caution panel.

