Categories
THC Project

THC – Work has started – Jan 29th

Finally – The main event has started!

the THC construction. I have decided to use the services of a profesional carpenter to make the cuts I need. the cost was minor – around 15$. board are 18 mm and 4 mm plywood.

These are most of the parts – some pieces were too small for a “production line” carpenter to do (they do mostly furniture, and getting them to do all the fine details I need would have blown the price beyond any proportion). So I still have some fine tuning to do.

THC parts
THC parts

The THC box will have an opening on the right side (Keypad would be attached on the left) the opening will be covered with a slide door. this will allow access for maintenance. internaly the Box is partitioned to two. Front segment will house the Stick and support the mechanics, it is made of a thick back plate (sitting in the center of the outer box) and a very thin front plate to minimize the lose of stick length during it’s travel. Aft compartment is a sliding door with a thick plate on which the IPAC sits. it is also to allow easy access. (In theory I can get the whole controller out and work on it. Practicly I’m afraid the cables from the Keypad are too short :(. (I was originally planning on using IDE connectors – but My soldering is so bad, I’m better off without it).

THC box - Side view
THC box – Side view

Visible in this Image are the Middle buffer and the Aft slide door.

THC bos - diagonal view
THC box – diagonal view

This is with the Front Buffer.

the parts not shown here are the right wall (short piece that will sit on the front, mainly to provide 4 side support of the plywood in front) and right slide door. I need to cut it and make a slide in it – in addition I still need to cut “handles” for the slide doors.

I also need to drill holes for the USB cable for the controller, for the cabling from the keypad, holes on the Mid buffer for the Guide rails that will allow the Stick to move back and forth and last are attaching two stubs to the mid buffer (and drill matching holes on the left wall of the box).

Some of it does not make sense right now – I know, I just can’t get it to make sense in writing nor in 2D sketches (and I cant really draw 3D). But hopefully as the Build will continue, it will make more and more sense.

And this is the link for the PDF with the sketches. all the notes are in Hebrew (sorry, didn’t think about it while I made it – I was too busy making it to make sense to the carpenter). All measurements on the PDF are in centimeters, but use them as guidelines only, do the math acceding to the wood you are going to use, 10, 12 and 15 mm plywood would be just as good, but will require you to do your calculations from scratch.

Download PDF from here

grooves were planed to be 3 mm deep and 4 mm wide, the equipment limitation stated 4 mm deep, I have fixed the measurements on the fly for some of the parts, other got some extra material I need to shave of with a file or sandpaper. in addition the grooves go from edge to edge of the wood, and not stop short as with the sketches.

Categories
THC Project

Keypad – Update No.3 – 28 Jan 2009

Well, the Keypad is done, painted and assembled…

Next on the Menu is wiring. First stage is connecting the commons together to a single line.

http://www.youtube.com/watch?v=FABmvlXON44

then we need to wire up the key pad. each keypad PB will be connected with two lines. One unique for each of them – for a key stroke. Second will be connecting all the PBs to a single keystroke on the I-PAC  that will function as a CTRL, SHIFT, ALT or what ever will be required to activate the layout for the keypad.

again, going with MAME project lines. I’m using CAT5 Network cables.

http://www.youtube.com/watch?v=kSdH2w1SJN4

Word of advice – if possible use CAT5E cables and not normal CAT5. The CAT5E have thick copper wire as a conductor. while CAT5 use multiple very thin wires – that are much less durable.

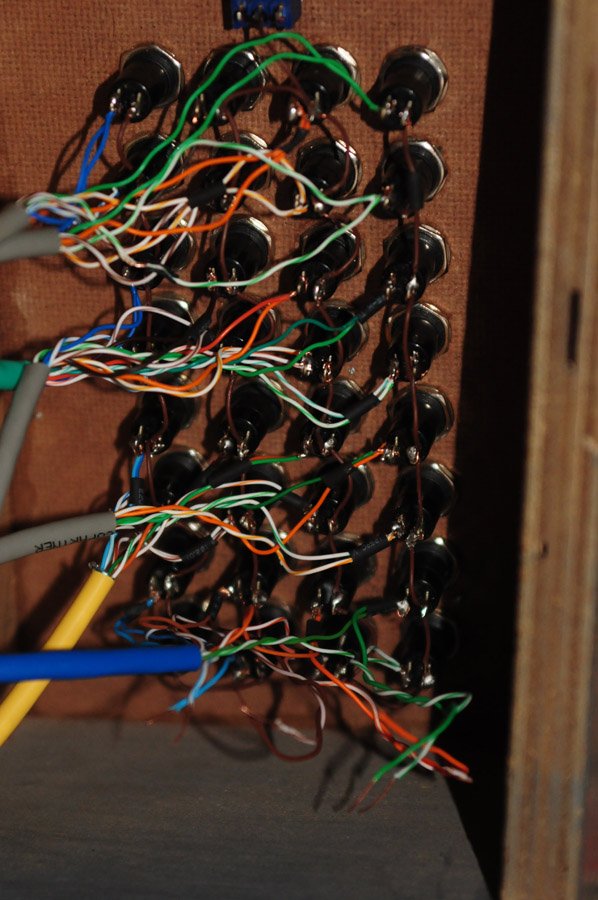
This is how it looks like after all the wiring is done.

keypad-partial-wireing

The last step that still needs to be done is connecting a diode to every lead for the joint connector.

Categories
THC Project

Keypad – work in progress, part 2 – 20/1/09

I’ve started doing the wood work,

Now that I have all the electronics I need for the keypad, and I have a fairly good concept of what I need to do after a test drilling I went on and started building the operational thing.

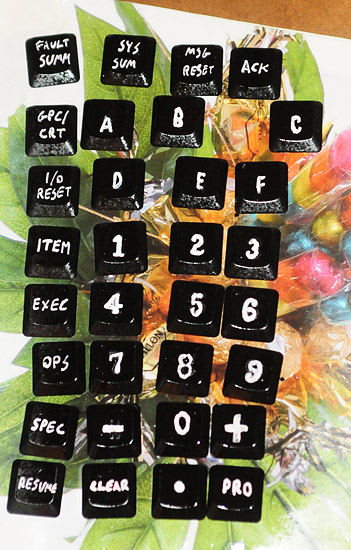
first I had to make the keys themselfs. I took the Laptop keys written on and covered with laquce (see previews post on the subject), and glued it to the pushbuttons I’ve bought.

Next was to construct a wooden box, I’ve choped off some old furnichers I found on the street, and drilled holes for the PBs.

Keypad - Before drillingKeypad - Post Drill

The box – before and after drilling

After this is done, I’ve mounted everything to make sure it fits. and off it does into paint.

keypad-prepaint2
Keypad – Before going into Paint
Categories
THC Project

Build update – 17/1/09

The I-PAC and Joystick arrived this week, so I was able to start testing the correct way to get everything working the way I wanted.

The stick connected to the controller During trials

I’ve hooked up the joystick to IPAC and started working on it. 2D control (UPDOWN and LEFTRIGHT translations) have been tested. I’ve also tested the keypad. Unfortunately the IPAC has some limitations I was not aware of.

  1. It only supports one keystroke per PB.
  2. it support key combinations only via a “Macro” command (only 4 macro commands are available)
  3. when a PB (PushButton) assigned to a macro is presses the macro is issued only ONCE.

After consulting with Andy from ultimarc (creator of the IPAC) We have come to a conclusion that the correct way of doing multiple key strokes will be to program a Macro that will be triggered along with a keystroke . that means that each PB will be connected to both a unique keystroke and a “common macro”. this generates another problem, because all the PBs will share a common ground and the “common macro” once one of the PBs will be pressed they will ALL trigger. Again, Andy has given me all the answers I needed, and the circuitry would include 1N4148 diodes connected on each of the “common macro” “legs” to prevent this from happening.

Keypad Test Drill
Keypad Test Drill

I have also made a test drilling of the Keypad panel, This was done in order to evaluate the accuracy of my “blueprint” and to make sure I know what are the correct drill sizes I need.

Categories
THC Project

Build has started – Keypad, Part 1

I’ve finally went and bought all the switches I need for the keypad.

I’ve got 32 Pushbottons, 1 toggle switch and IDE “Bath”. (I actually got spares for everything due to the lack of sodering skills). all for about 25$

I’ve also “salvaged” 34 Laptop keys (32+2 spares) for gluing on top if the pushbuttons. I’ve got cheaper type of pushbuttons to cut down costs (and not the square type I was thinking to buy).

I’ve wrote the text directly onto the plasic and sprayed with a coat of Lacquer for protection. my hand writing is well, bad – but I found no Other way to get white text within the key size (1.8 cm).

Keys drying after Lacquer coating
Keypad drwing
Keypad drwing
Categories
THC Project

THC Project Expands.. :)

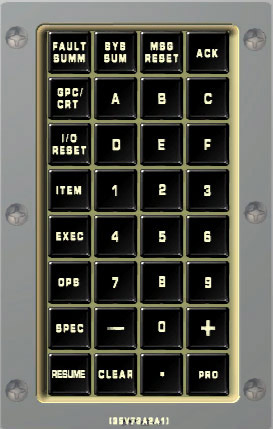
SSM2007 Keypad
SSM2007 Keypad

The I-Pac VE controller chosen for the Project – supports 28 switches, the THC itseft will use only 6 of them.

So I will try and add a keypad and hopefuly it will be functional later on down the road – on current SSM version (2.4) it will not be functional.

I’m pretty sure I will use the Apem 1415N switches – they pretty much what I need (and only a tad smaller then the real thing). but that might change during the build (havn’t ordered them yet).

I will try and use an IDE connector – but I am currently unable to find a decent IDE socket. I’ll need to start scavange Mobos to see if I can dissmental two.

if this will not wok, I will use an IDE cable (without the connectors) – this will allow me to hook up all 33 planed switches (from the keypad side) for future possiable upgrade.

shuttle Keypad is 8*4 – which makes it 32 switches . In addidtion I plan of using the controller “Shift” functions to allow me to use a simple off-on toggle switch and use the same keypad as two of the shuttle keypads (future upgrade will also allow On-Off-On switch to simulate 3 keypads by running two seperate shift modes).

A short count shows that the current controller only allows 22 more switches to be connected (6 are THC). luckly for us SSM only uses 21 of the keypad’s 32 keys. 0-9,period (.), + and -,OPS, ITEM, EXEC, SPEC, PRO, CLEAR, RESUME and GPC/CRT. one is of course the toggle switch.

Categories
THC Project

Off we go!

This Blog/site will follow my THC project.

THC at work during STS-57

The project was born from the desire to have as much fun as possiable out of Space Shuttle Mission 2007. But hopefully it will also usful for every space sim around.

First some background.

The basic concept is simple and striaght forward. to make a functional and affordable Transitional Hand Controller.

A few important requirements that must be met were made – and they Guide the design.

  1. Due to current application limitations (as of Dec 2008) – the THC must transmit key presses.
  2. The THC must be programmable. For compensation for changing keyboard layout, and to enable support for other games as well.
  3. USB or PS2 interface – with preference to USB for future support (“Built to last”)
  4. Make it as simple as possible – for an electronic noob like me, it’s a must.
  5. 3 axis control at the same time
  6. functionality as close to the Real deal as possible
  7. Ability to Expand, customize and upgrade – simple as possible.

The Design

I’m going for a simple concept, use shelf products (with adaptations) in custom housing. The Design is greatly based on work done by Arcade fans in the MAME project. thanks to them a lot of hardware is available. for example:

For the “Push/pull” axis I will try and mount the stick on four guide rails using the holes for the screws, I will then “lock” it into place with springs to allow about 1.25 Inch (3CM) of

movement. this will cause a microswitch to close triggering the FWD/AFT translation command. but it will probably change a bit when I’ll see the stick.

Expandability

the I-Pac2 controller I’ve chosen allows 28 buttons (one of them can be a “shift” button). and the THC functions only require 6 of them (four ways+push/pull). that leaves me with 22 unused commands. those would be useful for a keypad.

I will probably add in and external connector to allow easy hooking up of add ons (such as the keypad) – the connector will probably be an LPT port (25 pin serial) or an IDE connector (40 pin interface). the LPT is simpler to obtain while the IDE will allow further upgrade via the I-PAC4 controller, allowing a full shuttle keypad (32 keys + a shift toggle). on IPAC2 the keypad will be more limited and will only have 21 keys (and one shift toggle).

more on that as the project moves ahead.